
Here are the following steps in my design process:
- Ideation > I brainstormed five different ideas to explore before ultimately settling on a projection portrait. My plan: project light (as a pattern or color) onto myself in a dark room and take a long exposure portrait.
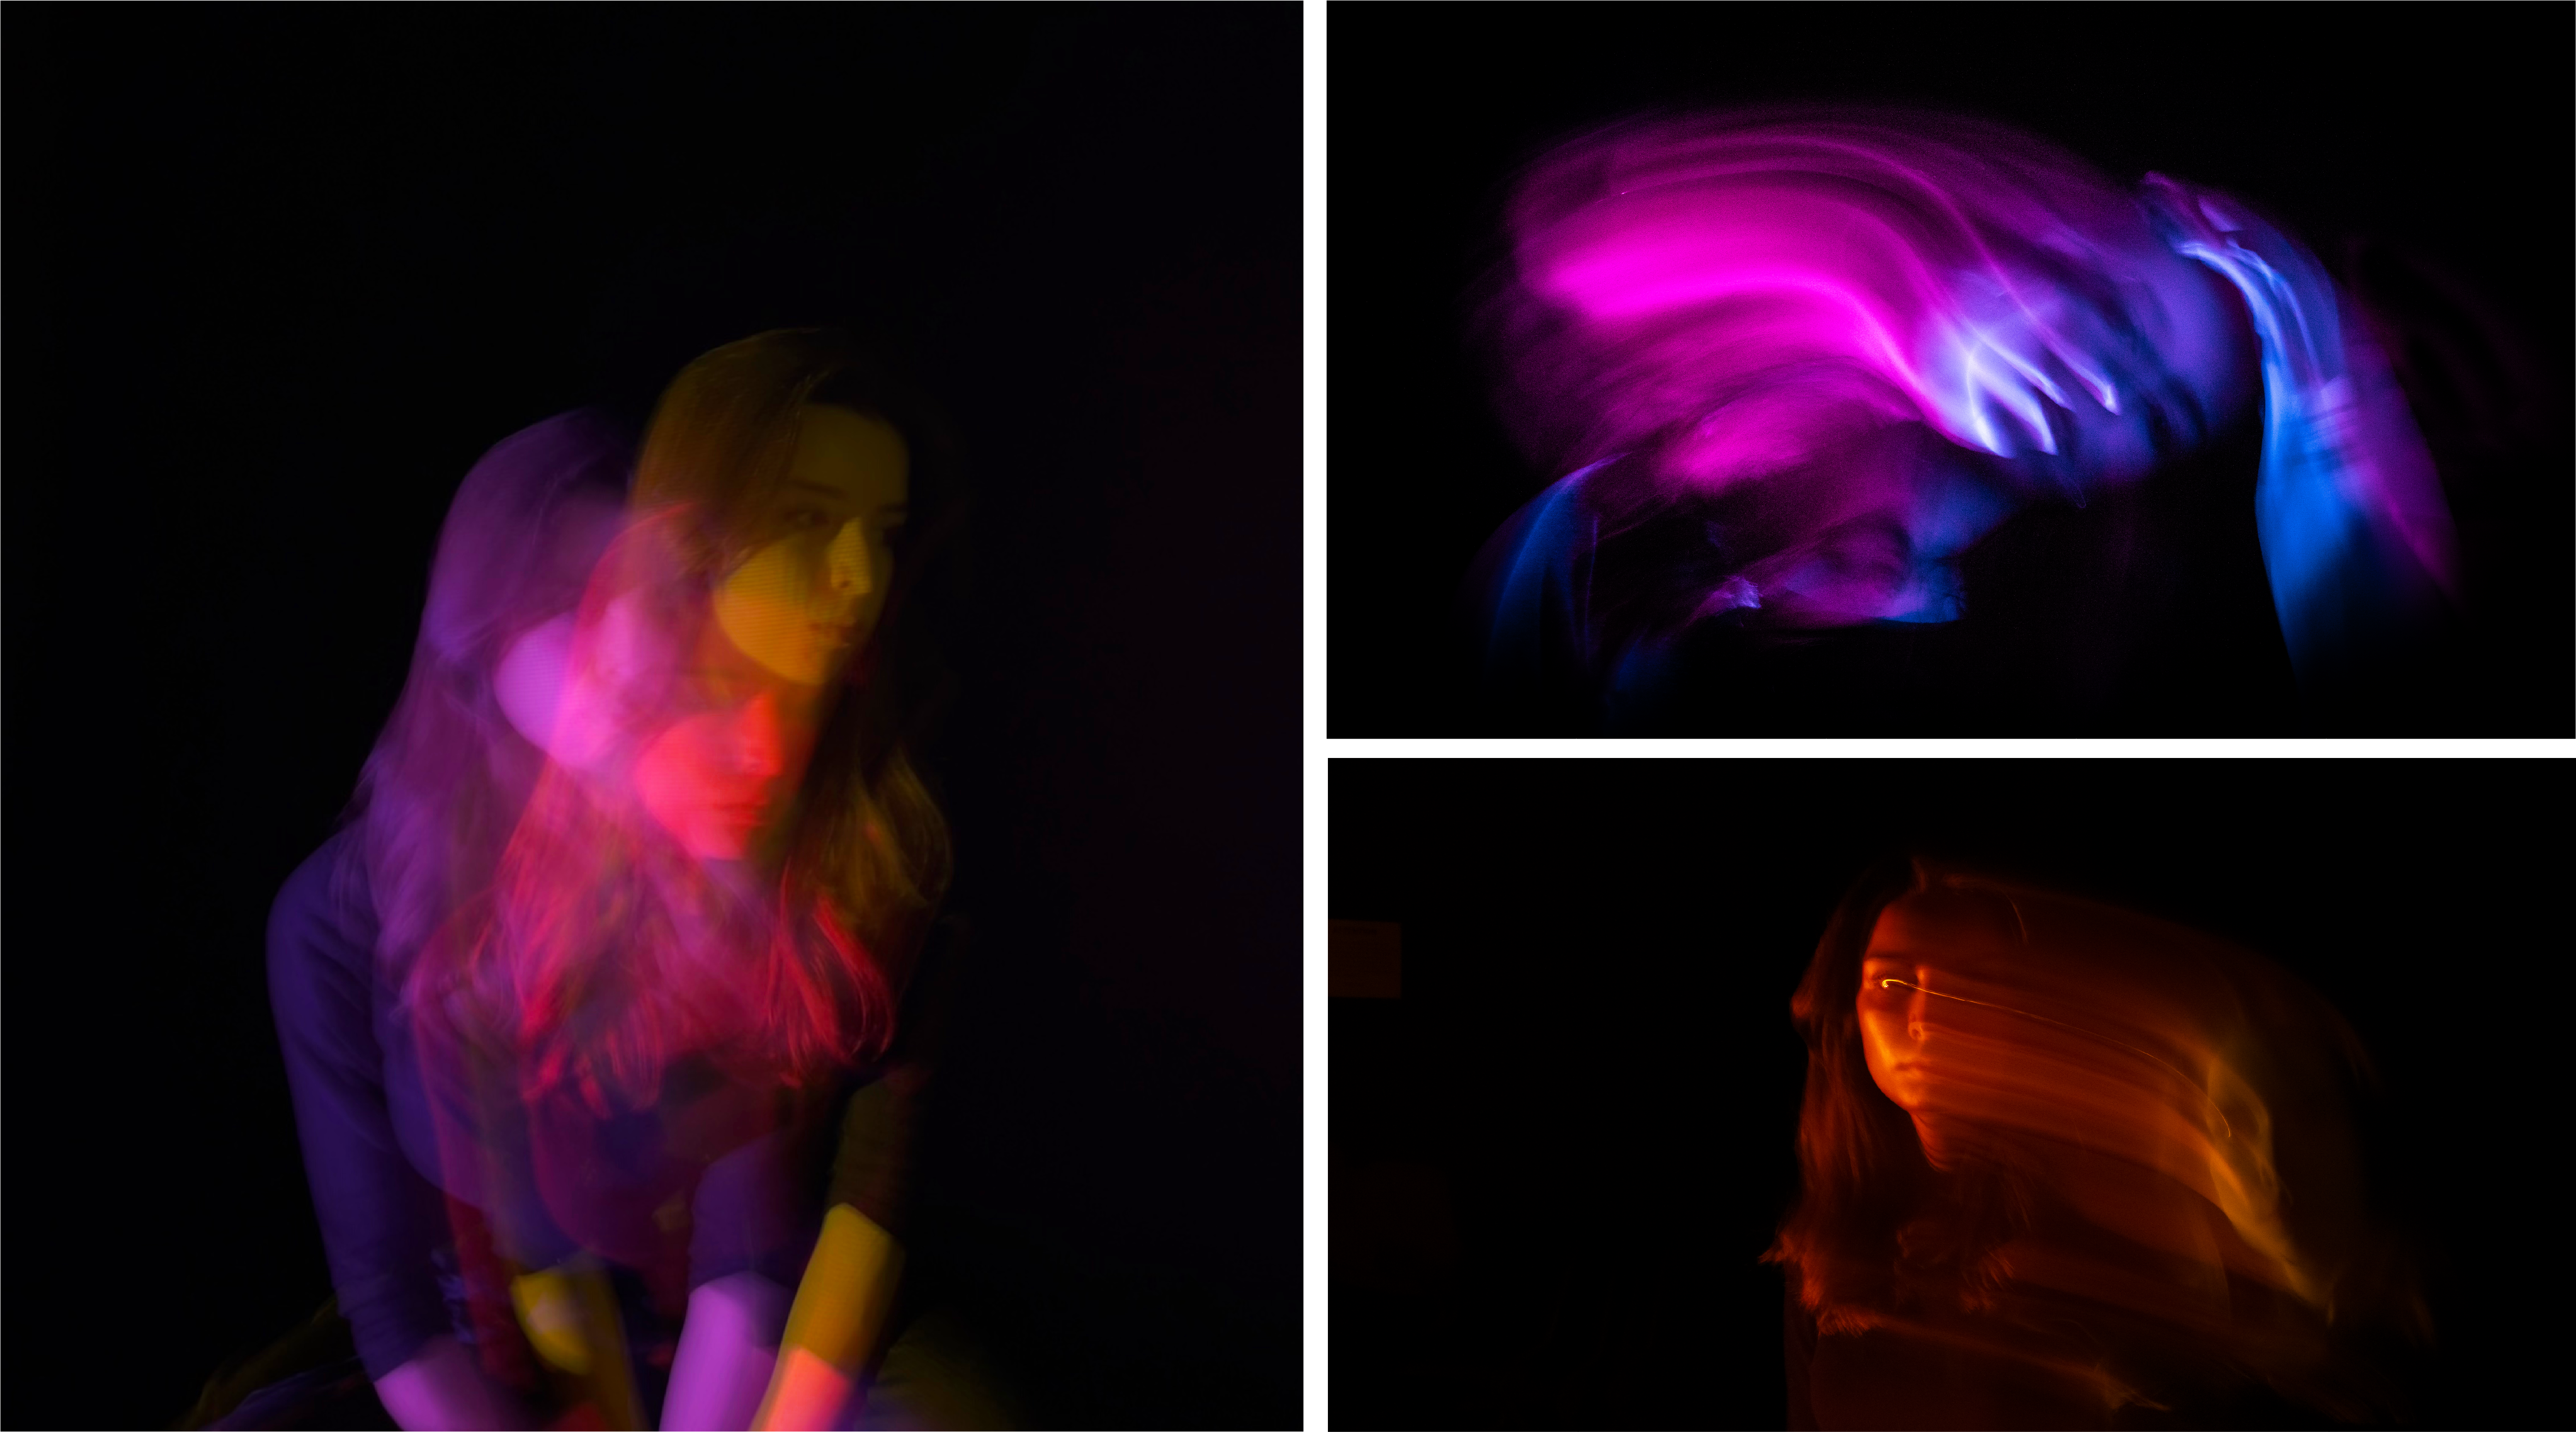
- Draft 1 > For draft one, I experimented projecting several different patterns and colors. This allowed me to flush out what had the best results. Another variable I experimented with was the placement of the camera and projector (did I want a colorful or dark background?). I used my iPhone to do my first rough drafts. Here are some first drafts:

3. Planning and Revisions > After viewing the results from draft 1, I decided that I wanted to project slow, strobing colorful lights and I wanted a dark background. Having a dark background proved to be my biggest challenge. Below is the diagram of the setup.

4. Final Drafts > I followed the diagram and my goal of this final shoot was to nail down the correct camera settings. Here are some of the biggest tweaks I made on the manual setting: shutter speed 1″; F8.0; ISO 1600 in RAW format.
5. Polish > out of the shoot, I selected some of the best to edit in order to enhance the colors and overall clarity of the images.
Thank you for your time!